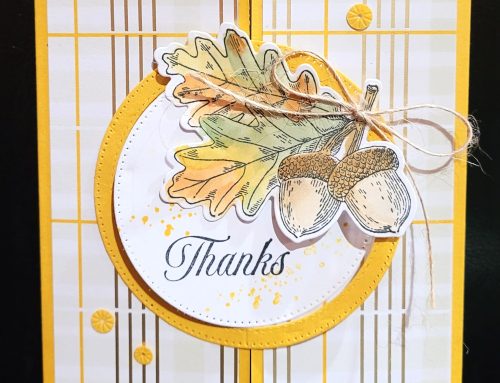
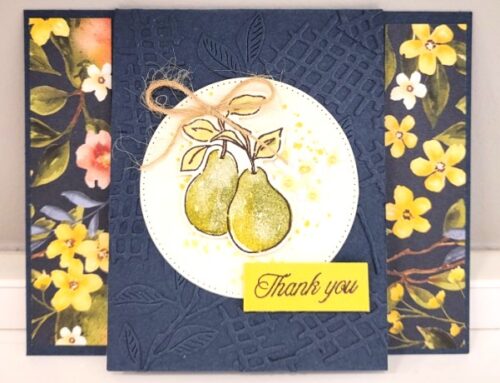
The card that I want to show you today features the Mosaic Mood Specialty Designer Series Paper (DSP). The paper in the book really does not do the justice. Mosaic tile have designs and floral imagery with shiny accents. Because the paper is so beautiful there is not so much stamping involved in the card.

Here are the measurements for the paper
- Basic Black:
- 8 1/2 x 5 1/2″ (cut 8 1/2 x 11 paper half in the long way)
- Very Vanilla:
- 5 1/4 x 4 (for inside of the card)
- Mosaic Mood Specialty Designer Series Paper:
- 5 1/4 x 4
- Roses, leaves, and butterfly
Here is how:
- Fold the Basic Black card Stock in half as card base.
- Used the Stitched Rectangles Die to cut the pink Mosaic DSP frame. I laid two dies together and ran through the Big shot to cut out the frame.

- Glue the Mosaic Mood frame to the Basic Black card base.
- The Rose Mosaic paper is really beautiful. I cut out the roses and butterfly from the paper.


I separated the roses into two pieces

- I like more green leaves so the rose can show better. I cut some extra leaves to add under the full bloom rose.
- Assembled the roses, leaves, and butterfly inside the frame. I used the Stampin’ Dimensionals to attached the full bloom rose and butter to the card to created more depth for the card.


- Before I put the sentiment on the card, I tied a bow with 3/16″ Braided Liene Trim and used Scotch tape to tape the bow to the card.
- Stamped the sentiment on Whisper White paper and use Timeless Label Punch to punch it out.
- Assemble the sentiment to the card with Stampin’ Dimensionals.
Here is the card from different angles so you can see the 3D view better


Ready to create? Here’s what you need:

Memorable Mosaic Bundle
#151063
$36.00

Memento Pad
#132708
$6.00

Mosaic Mood Specialty DSP
#149478
$14.50

Basic Black CS
#121045
$8.75

Stampin’ Dimensionals
#104430
$4.00

3/16″ Braided Linen Trim
#147808
$7.00

Rhinestone Basic Jewels
#144220
$5.00
Thanks for Looking!