😊😊Happy Thursday😊😊
I conduct a Facebook Live Event every Wednesday at 7:00pm central time. My goal is to post the video, measurements and all the information about the Facebook Live Event on Thursday.
Today I want to show you how to use masks to create super cute and super easy cards again. A couple weeks ago, I used “Embossing Paste” and “Masks” to create the 3D background and today, I am just going to use the masks with the inks to create the beautiful background. If you want to see the projects that we did a couple weeks ago, you can click here.


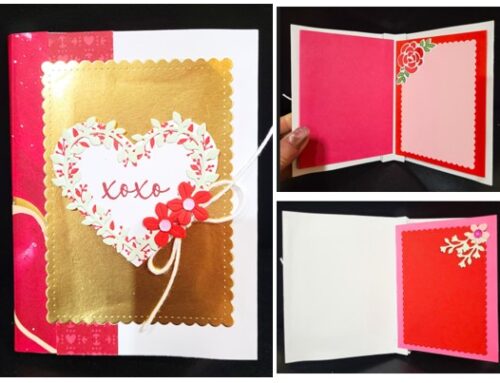
The 1st card is made with the super super cute “Little Monkey” bundle.

Here are the pictures of the 1st card: Which card do you like?

The leaves with only outline details

The leaves with outline and vine details
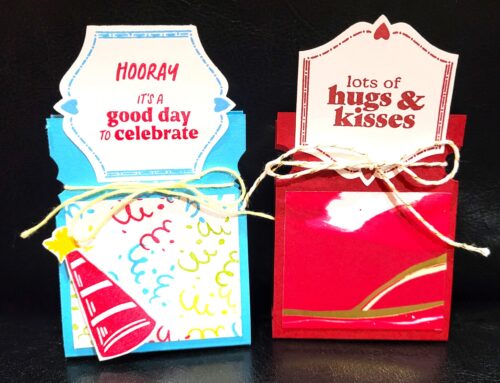
The 2nd card is made with the “Hello Ladybug” and “Ladybug Builder Punch”. Since this stamp set and punch are carried over from the other catalogs, they are not in the bundle anymore. When you place the order, make sure you order both pieces.


Here are the pictures of the 2nd card: which circles do you like?

Use “Layering Circle” Dies in the card.

Use “Stylish Shapes” Dies in the card.
Here are the measurements for the card:
Basic White:
- 8 1/2 x 5 1/2 (card base)
- 3 3/4 x 5
- 3 x 3 (circle)
Real Red/Daffodil Delight:
- 4 x 5 1/4
- 3 1/4 x 3 1/4 (circle)
Monkey:
- Pecan Pie: 2 1/2 x 2 (body)
- Crumb Cake: 2 x 1 (face & ears)
Ladybug:
- Real Red: 2 1/4 x 1 1/2 (wings)
- Basic Black: 2 x 2 (body)
Weekly Special:
You must use Hostess Code SBGSX94Z when you check out to get the FREE gifts. All dollar amounts are before tax and shipping.
$50 +order: FREE Stampin Dimensionals

$100+order: FREE Stampin Dimensionals + Tape Adhesive


Watch this Facebook Live event video on how to make this project. If you like my Facebook Live, please “Like” and “Share”💖💖
Watch on Facebook Click HERE
Watch on YouTube Click HERE
I hope you liked the project that I shared with you today. Happy stamping💖💖💖
Ready to create? Here’s what you need:

Paper Trimmer
#152392
$25.00

Little Monkey Bundle
#161379
$38.00
Hello Ladybug
#157693
$18.00
Ladybug Punch
#157698
$22.00

Bough Punch
#157711
$22.00

Tropical Leaf Punch
#161248
$22.00

Black Ink
#132708
$6.50

Granny Apple Green
#147095
$9.00

Garden Green
#147089
$9.00

Lost Lagoon
#161678
$9.00

Basic White CS
#159276
$10.25

Real Red CS
#102482
$10.00

Daffodil Delight CS
#119683
$10.00

Artistic Mix Decorative Masks
#159178
$10.00

Blend Brush
#153611
$13.00
Dimensionsals
#104430
$4.25
Thanks for Looking!